Monday, March 7, 2016

LC Slicer and Natasha Beads

like the most of us I accumulated a lot of scrap clay and needed to clean my clay table, it's fun putting this clay together and twisting and cut through it and voile' an interesting pattern emerges. Many times your piece is thick and can be a pendant by itself but I found it more interesting to slice it with my LC Slicer, getting thin veneer  and now you have more control over your design and what you do with it, the trouble is your piece isn't that thick and can't go all the way up to the blade, some put scrap clay on the back, but I put an acrylic block behind it and it was perfect.


the green and yellow was thinner and I needed to push the acrylic block closer to the blade by hand was very easy to do, here are a couple pictures  of the acrylic block, it measures 4" square x almost 1/2" thick.


the acrylic blocks are originally sold with rubber stamps, a base for unmounted stamps to stick to, they come in all sizes, I have one 12" long, the opening is 6" so if you have to buy one I'd pick the 6" square.


Monday, December 29, 2014

SpongeBob SquarePants

  1. SpongeBob SquarePants


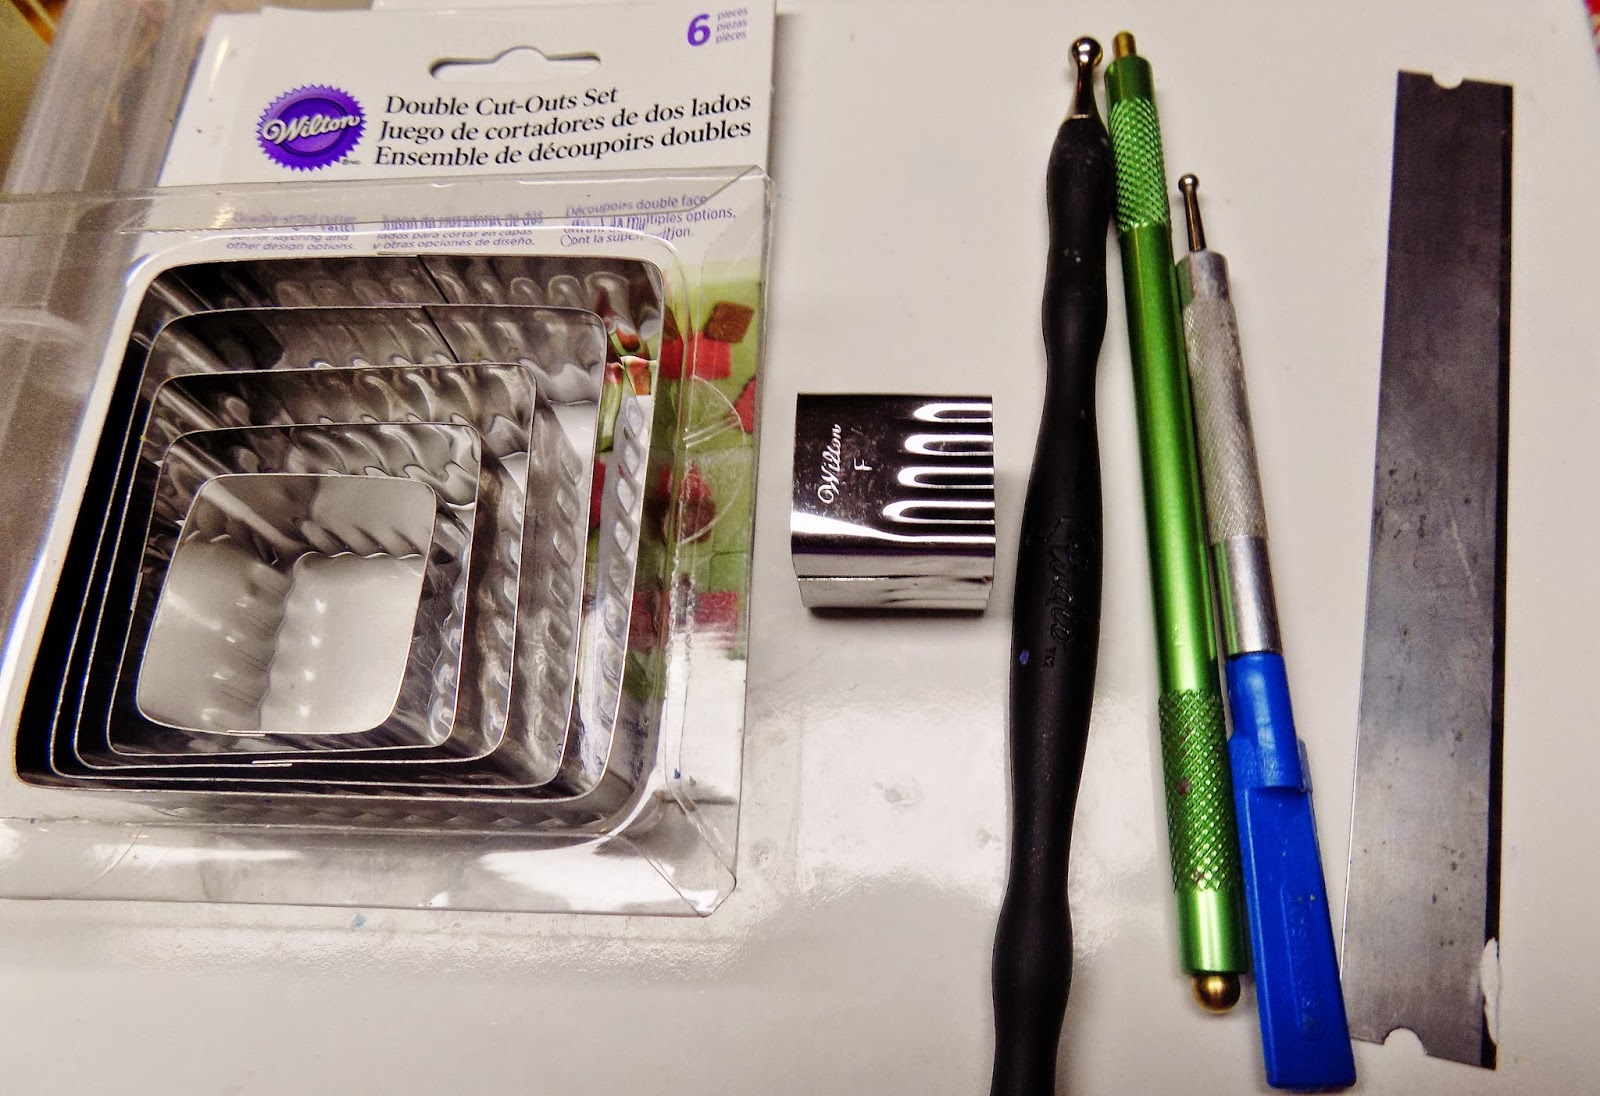
To make SpongeBob I used Sunshine Yellow, White, Black, Pearl  & Cadmium Red Primo polymer clays, Wilton Double Cut-Outs Set, it can be any square cutter straight or wavy, a blade and a few ball tools and my pasta machine.  For the tongue I added a small amount of Pearl to the cadmium red, for the back of the mouth I added a small amount of black to the cadmium red.  For the teeth I made a cane, I started with a round log of white clay and put a thin layer of black clay then made the log square then elongated it.  For the eyes I made a log of black clay then added a double thickness on the thickest setting on the pasta machine with blue clay, then doubled that amount of white clay, the best thing is for you to determine the amount; it shouldn’t be hard to balance it.  After you make the canes give it time to stiffen up, you can put it in the fridge for at least 30 minutes or it will be too soft and warm, or leave it alone at least overnight.
SpongeBob’s eyes bulge out, it’s very hard to get that because it distorts the eye cane so I cut it about 1/8” thick.  If you look at the top view of the canes on the far right you will see a couple eyes I was playing around with, that’s when I thought it best not to play with the canes, just get it the way you like it and leave it like that.

Don’t forget to give SpongeBob eye lashes, he has 3 long lashes.


You don’t have to make an eye cane or tooth cane, I chose to because I was making a large amount to give away at Christmas.  I thought I would use both canes on other projects.


Saturday, December 27, 2014

Japanese Kokeshi Doll


Kokeshi Dolls, I decided to make one for a gift, this was my first attempt at anything like this, I was nervous, I wanted this to be perfect and special, I researched it thoroughly and decided what I wanted it to look like, I chose to put a rose cane on for decoration so I picked a color to compliment the rose cane.   I made the doll then did the face with polymer clay last it looked horrible, not the way I wanted it to look, I was very upset and nervous so I put it aside for a few days and thought about it, I calmed down and cut out the eyes and mouth then gave her a new face, I baked her and painted her eyes and lips with Sharpie Oil Base Paint Pens, that worked out so much better, I learned so much, mostly stay calm, have confidence in yourself, it can always be re-done and touched up.  Another good tip is take pictures and study your picture, if you don’t like the hair it’s easy enough to re-do, you don’t have to leave it that way, you don’t like the neck?  It’s not too late to make changes, it can be baked many times, just read my blog about the importance of preheating ovens and oven thermometers.  Give yourself enough time, if I did I could have changed a few things but I’m pretty happy with my first attempts at anything like this, my first attempt at drawing a face on a doll.  My next doll will be larger and better.  Any suggestions for me?

Polymer Clay is such a fun medium to work with, always learning new things and having a better understanding of every aspect of the art.  People always tell you to use an oven thermometer and to preheat your oven but no one tells you WHY!  Well I finally figured that out, when I put my convection oven on and watch the oven thermometer after a short time the heat spikes, I had it on 250 and it was 350!  No wonder my clay would darken and smell like burned plastic, now everything looks great, no smell.  Cindy Lietz suggest to bake it for 60 minutes to make it stronger, I thought that was too much but I would test my pieces and know Cindy is right, and I was worried about it darkening but I see that's not happening.  Another thing Cindy advises to putting card stock over to cover, I use cardboard from food packaging, making sure no printing touching my clay, my pieces have never looked better, thanks Cindy!  Here are Hello Kitty Pendants I made for my great nieces. 


Tuesday, April 30, 2013

Italian Cappuccino Cheesecake

Italian Cappuccino Cheesecake


 Imagine the perfect cup of cappuccino: frothy froth on top with a sprinkle of cocoa, creamy rich coffee with a touch of sweetness underneath.


 Ingridients:

 5 ounces graham cracker crumbs 
 14 ounces granulated sugar, divided 
 1 tablespoon cocoa powder 
 3 ounces butter, melted 
 Pinch of salt 
 1 1/2 pound cream cheese, room temp 
 5 large eggs, room temp 
 2 teaspoons vanilla extract 
 2 1/2 cups heavy cream, divided 
 2 tablespoons Medaglia d'Oro instant espresso 
 2 tablespoons powdered sugar 
 12 chocolate covered coffee beans 
 Unsweetened chocolate for grating 


 Preparetion

 01 - Preheat oven to 325 degrees. Put a kettle of water on the stove to heat. Stir together crumbs, 2 ounces granulated sugar, cocoa powder, melted butter, and pinch of salt until fully blended. Spread evenly over the bottom of a 10" springform pan, then press very firmly all over. 

 02 - If eggs are not at room temp, fill a bowl with warm (not hot) water and soak them for 5 minutes, then remove. You'll be making an emulsion with the cream cheese, sugar, and eggs, and your results will be much better if all ingredients are at room temp. For cream cheese, I let it sit out overnight. 

 03 - Measure cream cheese and 12 ounces granulated sugar into bowl of a stand mixer fitted with the paddle. Mix on lowest speed until fully blended and no lumps of cream cheese remain. Stop mixer, drop bowl and scrape very thoroughly around sides and bottom. Raise bowl and mix to blend what you scraped loose. 

 04 - Crack eggs into a bowl. With mixer running on lowest speed, tip one at a time into mixer bowl. This is your emulsion; take your time and allow each to be fully incorporated before adding the next. After all eggs have been added, once again stop mixer, drop bowl and scrape very thoroughly around sides and bottom then raise bowl and mix to blend what you scraped loose. 

 05 - Warm 1/2 cup cream in a microwave just enough so that you can dissolve the coffee in it. Stir to blend, then add to filling mixture along with vanilla. Mix on lowest speed until fully incorporated. 

 06 - If your springform pan is prone to leaking, you may want to wrap the outside with foil. Turn filling into pan. Set pan in the center of a rimmed baking sheet. Set the baking sheet on center rack in oven with front edge protruding slightly. Carefully pour hot water into baking sheet until it comes almost to the lip of the sheet. Gently slide it the rest of the way into the oven. Bake for 45-55 minutes. Start watching it carefully at 45 minutes. Custards are done when you can bump the edge of the baking vessel and the contents will, I'm not making this up, jiggle like jello, not wiggle like a wave. 

 07 - When done, remove cheesecake pan from oven and allow to cool to room temp before refrigerating overnight. The next day, run some warm water into a sink and set the cheesecake pan in it for a few seconds. Remove to a towel and run a narrow spatula all the way around edge. Release and remove springform ring. Whip remaining cream with powdered sugar and spread over top of cheesecake. Arrange chocolate covered coffee beans evenly around edge, then grate unsweetened chocolate over the top -- as much as you like. 

 08 - The best way to cut a cheesecake is with a hot, wet, flat-bladed knife (not a curved chef's knife). Run your blade under hot water, shake it off slightly, make a cut, then repeat for as many slices as you need, being sure to rinse all cheesecake off before making the next cut.

 09 - Serve with a steaming cup of espresso.

Italian Cappuccino Cheesecake


Imagine the perfect cup of cappuccino: frothy froth on top with a sprinkle of cocoa, creamy rich coffee with a touch of sweetness underneath.


Ingridients:

5 ounces graham cracker crumbs 
14 ounces granulated sugar, divided 
1 tablespoon cocoa powder 
3 ounces butter, melted 
Pinch of salt 
1 1/2 pound cream cheese, room temp 
5 large eggs, room temp 
2 teaspoons vanilla extract 
2 1/2 cups heavy cream, divided 
2 tablespoons Medaglia d'Oro instant espresso 
2 tablespoons powdered sugar 
12 chocolate covered coffee beans 
Unsweetened chocolate for grating 


Preparetion

01 - Preheat oven to 325 degrees. Put a kettle of water on the stove to heat. Stir together crumbs, 2 ounces granulated sugar, cocoa powder, melted butter, and pinch of salt until fully blended. Spread evenly over the bottom of a 10" springform pan, then press very firmly all over. 

02 - If eggs are not at room temp, fill a bowl with warm (not hot) water and soak them for 5 minutes, then remove. You'll be making an emulsion with the cream cheese, sugar, and eggs, and your results will be much better if all ingredients are at room temp. For cream cheese, I let it sit out overnight. 

03 - Measure cream cheese and 12 ounces granulated sugar into bowl of a stand mixer fitted with the paddle. Mix on lowest speed until fully blended and no lumps of cream cheese remain. Stop mixer, drop bowl and scrape very thoroughly around sides and bottom. Raise bowl and mix to blend what you scraped loose. 

04 - Crack eggs into a bowl. With mixer running on lowest speed, tip one at a time into mixer bowl. This is your emulsion; take your time and allow each to be fully incorporated before adding the next. After all eggs have been added, once again stop mixer, drop bowl and scrape very thoroughly around sides and bottom then raise bowl and mix to blend what you scraped loose. 

05 - Warm 1/2 cup cream in a microwave just enough so that you can dissolve the coffee in it. Stir to blend, then add to filling mixture along with vanilla. Mix on lowest speed until fully incorporated. 

06 - If your springform pan is prone to leaking, you may want to wrap the outside with foil. Turn filling into pan. Set pan in the center of a rimmed baking sheet. Set the baking sheet on center rack in oven with front edge protruding slightly. Carefully pour hot water into baking sheet until it comes almost to the lip of the sheet. Gently slide it the rest of the way into the oven. Bake for 45-55 minutes. Start watching it carefully at 45 minutes. Custards are done when you can bump the edge of the baking vessel and the contents will, I'm not making this up, jiggle like jello, not wiggle like a wave. 

07 - When done, remove cheesecake pan from oven and allow to cool to room temp before refrigerating overnight. The next day, run some warm water into a sink and set the cheesecake pan in it for a few seconds. Remove to a towel and run a narrow spatula all the way around edge. Release and remove springform ring. Whip remaining cream with powdered sugar and spread over top of cheesecake. Arrange chocolate covered coffee beans evenly around edge, then grate unsweetened chocolate over the top -- as much as you like. 

08 - The best way to cut a cheesecake is with a hot, wet, flat-bladed knife (not a curved chef's knife). Run your blade under hot water, shake it off slightly, make a cut, then repeat for as many slices as you need, being sure to rinse all cheesecake off before making the next cut.

09 - Serve with a steaming cup of espresso.

Monday, September 24, 2012

Mokume Gane Blue & Red Necklace & Earrings

Mokume Gane in Polymer Clay
I just finished a pretty set, necklace and earrings


I use Premo clay, it's easier to slice through and I like the results better, this set I used red, blue, gold and the white I mixed with pearl, almost all the clay I use I mix, I like adding glitter clay for sparkle and pearl gives a nice rich color.  You can see more of my work on pinterest http://pinterest.com/donnadecicco/