Monday, December 29, 2014

SpongeBob SquarePants

  1. SpongeBob SquarePants


To make SpongeBob 
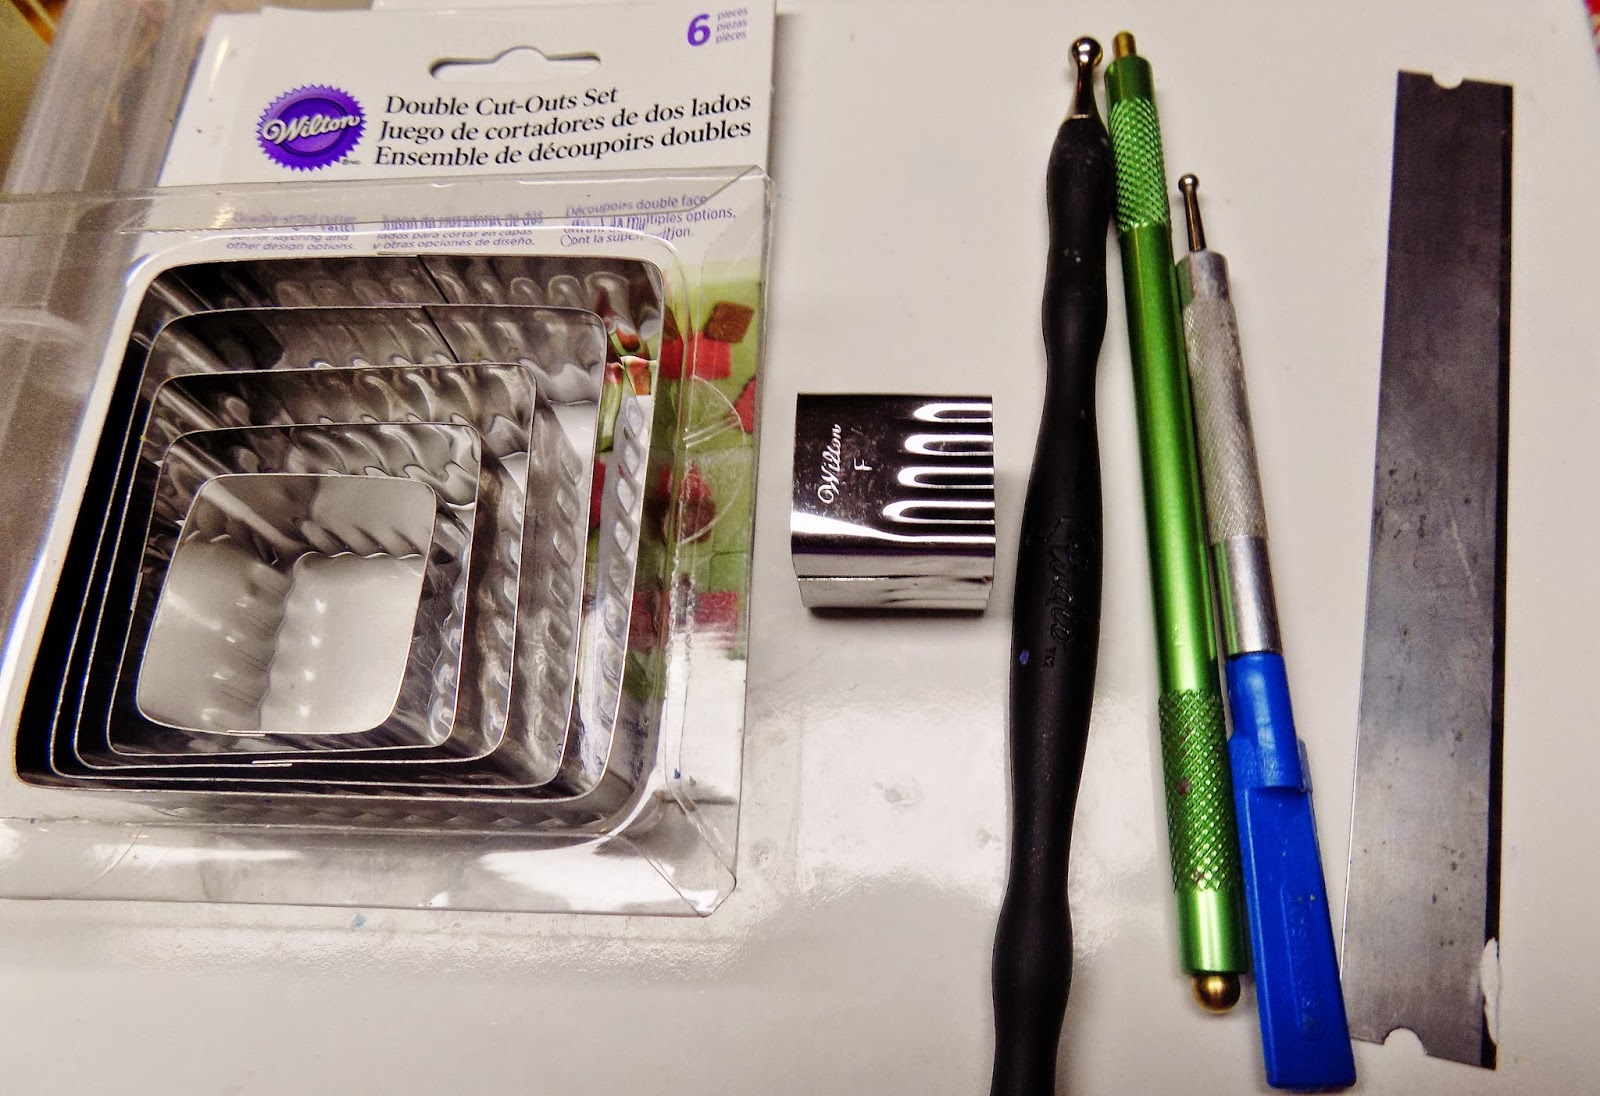
I used Sunshine Yellow, White, Black, Pearl  & Cadmium Red Primo polymer clays, Wilton Double Cut-Outs Set, it can be any square cutter straight or wavy, a blade and a few ball tools and my pasta machine.  For the tongue I added a small amount of Pearl to the cadmium red, for the back of the mouth I added a small amount of black to the cadmium red.  For the teeth I made a cane, I started with a round log of white clay and put a thin layer of black clay then made the log square then elongated it.  For the eyes I made a log of black clay then added a double thickness on the thickest setting on the pasta machine with blue clay, then doubled that amount of white clay, the best thing is for you to determine the amount; it shouldn’t be hard to balance it.  After you make the canes give it time to stiffen up, you can put it in the fridge for at least 30 minutes or it will be too soft and warm, or leave it alone at least overnight.
SpongeBob’s eyes bulge out, it’s very hard to get that because it distorts the eye cane so I cut it about 1/8” thick.  If you look at the top view of the canes on the far right you will see a couple eyes I was playing around with, that’s when I thought it best not to play with the canes, just get it the way you like it and leave it like that.

Don’t forget to give SpongeBob eye lashes, he has 3 long lashes.


You don’t have to make an eye cane or tooth cane, I chose to because I was making a large amount to give away at Christmas.  I thought I would use both canes on other projects.


Saturday, December 27, 2014

Japanese Kokeshi Doll


Kokeshi Dolls, I decided to make one for a gift, this was my first attempt at anything like this, I was nervous, I wanted this to be perfect and special, I researched it thoroughly and decided what I wanted it to look like, I chose to put a rose cane on for decoration so I picked a color to compliment the rose cane.   I made the doll then did the face with polymer clay last it looked horrible, not the way I wanted it to look, I was very upset and nervous so I put it aside for a few days and thought about it, I calmed down and cut out the eyes and mouth then gave her a new face, I baked her and painted her eyes and lips with Sharpie Oil Base Paint Pens, that worked out so much better, I learned so much, mostly stay calm, have confidence in yourself, it can always be re-done and touched up.  Another good tip is take pictures and study your picture, if you don’t like the hair it’s easy enough to re-do, you don’t have to leave it that way, you don’t like the neck?  It’s not too late to make changes, it can be baked many times, just read my blog about the importance of preheating ovens and oven thermometers.  Give yourself enough time, if I did I could have changed a few things but I’m pretty happy with my first attempts at anything like this, my first attempt at drawing a face on a doll.  My next doll will be larger and better.  Any suggestions for me?

Polymer Clay is such a fun medium to work with, always learning new things and having a better understanding of every aspect of the art.  People always tell you to use an oven thermometer and to preheat your oven but no one tells you WHY!  Well I finally figured that out, when I put my convection oven on and watch the oven thermometer after a short time the heat spikes, I had it on 250 and it was 350!  No wonder my clay would darken and smell like burned plastic, now everything looks great, no smell.  Cindy Lietz suggest to bake it for 60 minutes to make it stronger, I thought that was too much but I would test my pieces and know Cindy is right, and I was worried about it darkening but I see that's not happening.  Another thing Cindy advises to putting card stock over to cover, I use cardboard from food packaging, making sure no printing touching my clay, my pieces have never looked better, thanks Cindy!  Here are Hello Kitty Pendants I made for my great nieces.